Sunday, August 10, 2008

Whip It Up 5 - Peach "Cobbler"

Why, you may ask, did I put "cobbler" in quotes in the title of this post? In my family, cobbler involves a pastry type crust like you would use in a pie - not the batter that forms a cake-like surrounding for the fruit in this recipe. To Bryon, however, that is cobbler. Clearly, we disagree. Nonetheless, I had a bunch of beautiful peaches on-hand last week that needed to be used ASAP, and I knew this would make him happy, so I made a modified version of his mother's "cobbler" recipe.

Instead of using sugar, I used Splenda, and I used what I refer to as "fake butter" (i.e., I Can't Believe It's Not Butter Light) for half of the butter called for in the recipe. Using Splenda and half "fake butter" didn't affect the final result in the slightest - in fact, in the future I'll try using all "fake butter." Bryon's mom noted that she often only uses half of the butter called for, and in the future, I'll do that as well, because I found that using the entire amount left the fruit fairly floating in butter. Oh, she also mentioned that this recipe works well with blueberries too.

The recipe was easy enough, and Bryon (as resident expert on how this recipe should turn out tasting) didn't think subbing Splenda and "fake butter" affected the final result in the slightest. Since it's a favorite of his, I know I'll be having to make it again in the future. I'll work on trying to get an accompanying picture up soon.

Peach "Cobbler"

2 cups sliced peaches
2 cups sugar, divided*
1 stick butter
2 teaspoons baking powder
¾ cup flour
Pinch of salt
¾ cup milk
¾ cup sweetened coconut
½ cup chopped pecans

Preheat oven to 350. Mix peaches with 1 cup sugar. Place butter in deep pan (an 8x6x2 Pyrex works well) and place in oven to melt.

Stir together the remaining sugar, flour, baking powder, and milk to form a batter. Pour the batter over the melted butter – do not stir! Place peaches on top of the batter and sprinkle coconut and pecans over the top. Bake for 1 hour or until the crust is golden – the batter will rise to the top during baking.

Note: Depending on how sweet the peaches are, typically only ¼ - ½ of the sugar called for on the peaches is really necessary. The amount of butter called for can also be cut in half.

Source: Bryon's mom

Saturday, August 2, 2008

Whip It Up Week 4 - Chocolately Goodness!


Thanks to some extreme technical difficulties, I'm about two weeks behind in posting Whip It Up updates - sorry everyone!

One of my favorite things about being back in San Antonio is that I can occasionally run by Joseph's Storehouse - San Antonio's premiere restaurant/bakery/church - again for lunch or a sweet treat, like Amy and I used to do when we were at Trinity. Amy is a girl after my own heart and firmly believes in finishing most every meal with a little something sweet - Joseph's cookies were often just the thing we needed!

My mom and I stopped into Joseph's seeking a sweet treat on a trip to the area two years ago and discovered Joseph's gigantic chocolate fudge cupcakes. I noticed a framed newspaper article on the wall where the recipe had been printed and figured I'd have no trouble finding that particular article online - I was wrong.

Bryon and I met for lunch during the week at Joseph's recently, and I took the opportunity to furiously scribble down the recipe while Bryon was paying for our meal. Upon closer examination, the recipe is nearly identical to a sheet cake recipe that my mom has been making for as long as I can remember, except her recipe uses shortening, cinnamon, and there's less vanilla extract in the icing.

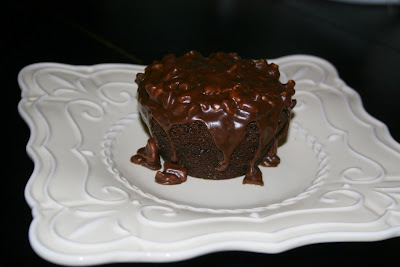
The cupcakes are rich, fudgey, and wonderful - definitely a winner! And, like my mom's recipe, it can be made as a sheet cake as well. Will I make it again? Probably - but I think I'll add the cinnamon to the batter that my mom's recipe includes. The recipe is very easy - I think even a very beginning baker would have no problem with these whatsoever.


Joseph's Chocolate Fudge Cupcakes

2 cups flour
2 cups sugar
1 ½ teaspoon baking soda
¼ teaspoon salt
½ cup cocoa
1 cup oil
1 cup buttermilk
2 eggs
3 teaspoons vanilla
¾ cup hot water

Preheat oven to 350. Grease jumbo muffin tin or rectangular cake pan. Sift dry ingredients together. Add liquid ingredients and mix well. Bake 25-30 minutes for large cupcakes, or 30-40 minutes for cake.

Icing

4 Tablespoons cocoa
6 Tablespoons milk
1 stick butter
3 cups powdered sugar
1 Tablespoon vanilla
1 cup chopped pecans

Begin preparing the icing approximately 5 minutes before the cupcakes or cake is done baking. Bring butter, cocoa and milk to boil. Remove from heat and add remaining ingredients, mixing well. Pour/spread over hot cake(s).

Source: Joseph's Storehouse Bakery, Grandma Goldsmith

Friday, July 25, 2008

Whip It Up Week 3 - An Asian Adventure!

I was in the mood for something different this week, and a package of ground pork spoke to me when I was in the grocery store the other day. Then I remembered there were two recipes over on Shawnda's blog that I had been wanting to try, and both of them used ground pork. Pork fried rice and potstickers it was!

Both recipes were very tasty and easy to follow. The fried rice was very easy to make. The potstickers involved more steps in terms of preparation, and folding the dumplings can be a bit of a challenge, but none of it was too difficult. I didn't pay proper attention to the cooking temperature for the potstickers, so mine didn't turn out quit right - in fact, the bottoms of my potstickers did stick to the pot. They may not have been pretty, but they still tasted great! I think we'll keep both of these recipes.

Shawnda serves her potstickers with an orange sesame dipping sauce. We just dip ours in soy sauce. I made a few modifications to the fried rice recipe. First, I used brown rice instead of white (which worked perfectly). I also added mushrooms to the assortment of vegetables because I really like them in my fried rice. Bryon doesn't eat mushrooms, but he's perfectly capable of picking them out. I also like more egg in my fried rice, so I used 2 eggs instead of the 1 the recipe calls for. Finally, I doubled the amount of soy sauce used in the recipe, and we both ended up putting more soy sauce over the rice on our plates.


Pork Fried Rice

½ lb. ground pork
1 Tablespoon vegetable oil
4 cups cooked rice, cold
½ cup green onions, chopped
1/3 cup carrots, chopped
¼ teaspoon pepper
1 cup green peas
1 egg
2 teaspoons sesame oil
1 Tablespoon soy sauce

Brown the pork over medium high heat, drain and set aside. Add vegetable oil to skillet over high heat, stir fry onions and rice. Add carrots and peas and stir fry for 2 minutes. Push rice to side. Whisk egg, pepper, and sesame oil and pour into skillet. Stir until egg is cooked and mix into the rice. Add pork and soy sauce, taste, and adjust seasoning as necessary.

Source: Confections of a Foodie Bride


Excuse my sad little bowl of potsticker pieces

Potstickers

½ lb. ground pork
1 Tablespoon sesame oil
2 Tablespoons soy sauce
1/3 cup chives
2/3 cup green onions
1 cup Napa cabbage, thinly sliced
2 cloves garlic, minced
Wonton wrappers (about 30)
1 Tablespoon vegetable oil

Cook the ground pork over medium heat until done. A dd the remaining ingredients (through the garlic) and cook until the greens have wilted nicely. Let the mixture cool just a bit and add it to the bowl of a food processor. Process the filling until it reaches the desired consistency.

Lay a wrapper on a flat, dry surface a put a tablespoon of the mixture in the middle. Using your fingers or a pastry brush, wet the wonton wrapper surrounding the filling and fold the dumpling, pressing the seams together: bring two opposite corners to the center; bring the remaining corners to the center one at a time and press tightly.

Add oil to a clean skillet over medium to medium-high heat and add dumplings. Add 1/3 cup water to the pan and cover tightly. Remove from heat when the dumplings are golden brown on one side (about 4 minutes)

Thursday, July 24, 2008

Whip It Up Makeup

I was a busy, busy superhero last week, and although I did managed to try a new recipe (two, actually), I didn't manage to find time to write it up and post it. So here are last week's recipes, and hopefully tomorrow I'll get this week's (and yes, there are two recipes again this week too) posted.

Our annual tubing trip was last weekend, and that meant I needed cookies! I decided to try my hand at two different recipes, but giving each a twist of my own. First, I decided to try out and "doctor-up" my grandmommy's peanut butter cookie recipe. Then I gave my friend Kasey's oatmeal-craisin cookie recipe a go and jazzed it up a little more. Both types of cookies were a big hit this weekend, so I think they'll definitely be made again, and neither recipe was any more difficult than your average cookie recipe.


Grandmommy's Peanut Butter Cookies - With a Twist!

1 cup butter, softened
1 cup sugar
1 cup firmly packed brown sugar
2 eggs
2 ½ cups all-purpose flour
2 teaspoons baking soda
¼ teaspoon salt
1 cup peanut butter
1 teaspoon vanilla extract
1 bag Reese’s baking peanut butter cups

Cream butter; gradually add sugars, beating well. Add eggs, one at a time, beating well after each addition.

Combine flour, soda, and salt; add to creamed mixture alternating with peanut butter, beginning and ending with flour mixture. Stir in vanilla. Fold in Reese’s cups. Cover and chill 1-2 hours.

Shape dough into 1-inch balls. If using Reese’s cups, roll in sugar, then place on ungreased cookie sheet. If not using Reese’s cups, place balls on ungreased cookie sheet and press with fork dipped in sugar to flatten cookies, making a crisscross shape on top. Bake at 375 for 8-10 minutes.

Yield: About 10 dozen.

Monkey Tree Oatmeal Craisin Cookies - Jazzed Up!

½ pound (2 sticks) butter, softened
1 cup firmly packed brown sugar
½ cup granulated sugar
2 eggs
1 teaspoon vanilla
1 cup all-purpose flour
1 teaspoon baking soda
1 (generous) teaspoon ground cinnamon
½ teaspoon salt
3 ½ cups Quaker oats (quick or old fashioned, uncooked)
1 cup Craisins 1 cup walnuts (toasted for 3-5 minutes at 350)
1-2 cups coconut

Heat oven to 350. In large bowl, beat butter and sugars until creamy. Add eggs and vanilla; beat well. Add combined flour, baking soda, cinnamon, and salt; mix well. Add oats and Craisins; mix well. Stir in walnuts and coconut.

Drop dough by rounded tablespoonfuls onto ungreased cookie sheets. Bake 10-12 minutes, or until light golden brown. Cool 1 minute on cookie sheets; remove to wire rack. Cool completely. Store tightly covered.

Yield: About 4 dozen.

Thursday, July 10, 2008

Whip It Up - Pasta!


Okay, for my first foray into the Whip It Up challenge, I stuck to the suggested theme of pasta. My friend Sarah had recently posted this Rachel Ray recipe on her blog and I was interested in trying it out. I made a few modifications of my own, which I have made note of below. Bryon and I both liked it, and it was super-easy, so I think it will definitely stay in our "rotation."

A few notes about this recipe (and RR recipes in general) from Sarah's blog:
  • Read through the entire recipe at least once before you start. There are always a couple of twists and turns that you might miss if you aren't ready for them.
  • You must chop/prep all the ingredients before you start cooking.

I used the entire 1/2 teaspoon of crushed red pepper that it called for. We tend to have somewhat "milder" palates. This amount was just fine, but any more would have been too much for us. Those out there who like spicier Italian dishes will probably want to add more. In the future, I'll probalby use just a little bit less. I may also cut back just slightly on the amount of fresh basil in the future (I was probably a bit heavy-handed with it this time). I love fresh basil, but it almost gave the sauce a slightly licorice-like taste. The allspice gives the sauce a really nice flavor, though. It sort of warms you from the inside out.

You only use half of the meat/tomato sauce in the final toss. The leftover sauce is supposed to be for topping purposes. We found this wasn't necessary. In the future, I'll probably just make a half-recipe of the meat/tomato sauce, since the other half is currently sitting in the refrigerator, waiting for me to come up with a use for it.

Not-sagna Pasta Toss

Easier than lasagna, because it's not, this pasta, meat sauce and ricotta toss-up is just as hearty and comforting as the layered Italian fave, but it's ready in a fraction of the time and with much less effort.

1 pound curly, short cut pasta (i.e., campanelle, fusilli, cavatappi)
Coarse salt
2 tablespoons extra-virgin olive oil (2 turns of the pan)
2 pound ground sirloin*
4 cloves garlic, chopped
1 medium onion, finely chopped
½ teaspoon crushed red pepper flakes (eyeball it in your palm)
Black pepper
½ teaspoon allspice (eyeball it in your palm)
1 teaspoon Worcestershire sauce*
½ cup dry red wine (a couple of glugs)
½ cup beef stock
1 28-ounce can crushed tomatoes
**3 teaspoons granulated sugar**
1 cup fresh basil (about 20 leaves)
½ cup grated Parmigiano-Reggiano (a couple of handfuls), plus some to pass at the table

Notes:
*I used whole wheat pasta, ground turkey, twice the amount of Worcestershire, and the entire 15 oz. container of ricotta.*
**RR's recipe does not call for sugar in the sauce. My grandmother taught me that almost any recipe involving cooked tomatoes needs some sugar to bring out the flavor, and I found that to be true of this recipe as well. **

Heat a large pot of water to boil for pasta. Salt water and cook pasta to al dente. Heads up: you will need a ladle of the starchy cooking water to help form sauce before draining.

Heat a deep skillet over medium-high heat. Add extra-virgin olive oil, 2 turns of the pan. Add the meat and break it up into small bits as it caramelizes. Once meat has good color to it, 4 to 5 minutes, add garlic, onions and red pepper flakes and season with salt, pepper, allspice and Worcestershire sauce. Cook another 5 minutes, deglaze the meat and onions with red wine, cook off a minute, then combine about 1/2 cup of stock into the meat. Stir in the tomatoes and bring to a bubble. Reduce heat to medium low and simmer 5 minutes.

Place ricotta cheese in the bottom of a shallow bowl. Add a ladleful of boiling, starchy pasta water to the ricotta and stir to combine. Add a couple of handfuls of grated Parmesan to the ricotta and mix it in.

Drain pasta. Toss hot pasta with cheeses. Add half the thick meat sauce to the pasta bowl and combine. Tear or shred the basil and add to the meat and pasta, toss again. Taste to adjust salt and pepper.

Serve bowlfuls of Not-sagna with extra sauce on top and more grated Parmesan to pass at the table.

Source: Express Lane Meals by Rachel Ray, Food Network

Sunday, May 4, 2008

Coconutty Goodness!

While thumbing through Tyler Florence's Real Kitchen cookbook (I am really liking this cookbook!) for ideas this past weekend, I stumbled upon a recipe that I knew I just had to try - coconut bread! I always keep a bag of shredded coconut in the freezer, and I also just happened to have a can of unsweetened coconut milk on hand, so I was set!

I did not, however, have any crushed pineapple on hand (fresh would have been another story), so I haven't gotten to make the accompanying pineapple butter yet. I'm sure it's fantastic, though, and I'm hoping to make some tomorrow.


Coconut Bread with Sweet Pineapple Butter

Coconut Bread:
1/2 cup (1 stick) unsalted butter, melted, plus more for greasing the pan
3 cups all-purpose flour
1 Tablespoon baking powder
1 teaspoon salt
1 teaspoon ground cinnamon
1 cup brown sugar, packed
2 eggs, lightly beaten
1 teaspoon vanilla extract
Zest of 1 lemon, finely grated
1 1/2 cups unsweetened coconut milk
1 1/2 cups shredded coconut, toasted (see Note)
Confectioners' sugar, for dusting

Note: To toast the coconut, preheat the oven to 350. Spread the coconut on a cookie sheet and bake for 10 to 15 minutes, stirring periodically (10 minutes was more than enough time for my coconut). Toasting will fluff up the coconut and increase its volume (as well as make it taste better).

Preheat the oven to 375. Grease the bottom and sides of a 9 x 5-inch loaf pan with butter.

In a large bowl, mix the flour with the baking powder, salt, and cinnamon.

In another bowl, whisk together the melted butter with the brown sugar, eggs, vanilla, and lemon zest. Pour in the coconut milk and whisk together.

Pour the wet ingredients into the dry ingredients and fold everything together until you have a smooth batter (a rubber/silicon spatula works well for this). Gently fold in the shredded coconut until evenly distributed.

Pour into the prepared loaf pan and set it on a cookie sheet. Bake for 1 hour to 1 hour 15 minutes, or until a wooden toothpick comes out clean when inserted into the center of the bread. Rotate the pan periodically while baking to ensure even browning.

Cool the bread in the pan for 20 minutes. Then, when bread is cool enough to handle, turn out of pan and remove bread to wire rack or cutting board to cool completely before slicing.

Pineapple Butter:
8 oz. can crushed pineapple, drained
1 cup (2 sticks) unsalted butter, softened

Press the liquid out of the crushed pineapple using the back of a spoon. (If there is too much juice, the fruit will separate from the butter.) In a small bowl, mash the pineapple with the softened butter until well blended. A food processor is a quick alternative to making the compound butter. Mound the butter in a small serving bowl.

To serve, toast the slice of coconut bread, dust with confectioners' sugar, and serve with the creamy pineapple butter.

Source: Adapted from Tyler Florence's Real Kitchen cookbook

Strawberry-licious

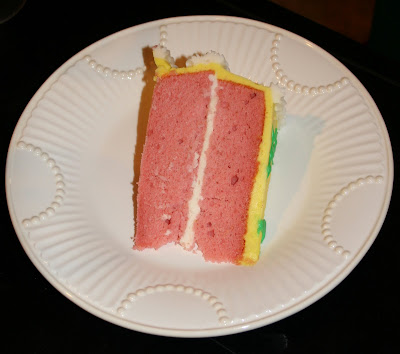
For the last week of my Wilton cake decorating class, I decided to change things up and do a strawberry cake with mascarpone filling and cream cheese icing. The cake was delicious! I was not nearly as pleased with how my decorated cake ended up looking (the cream cheese icing was just too soft for a lot of the decorating techniques I was using), so there were no "beauty shots" of the completed cake - just this one of a slice on a plate.


If this recipe looks familiar, I've made (and shared) it before, modified into cupcake form

Strawberry Cake

3 cups cake flour
2 teaspoons baking powder
1/2 teaspoon baking soda
1/2 teaspoon kosher salt
1 1/4 cups sour cream
1/2 cup fresh* strawberries, pureed
1 small package strawberry Jello
1 tablespoon pure vanilla extract
1 cup (2 sticks) unsalted butter, room temperature, cut into small pieces
2 cups sugar
5 large eggs, room temperature

Preheat oven to 350 degrees F.

Sift flour, baking powder, soda, and salt into a medium bowl. Whisk to combine evenly. Stir the sour cream, strawberries, jello, and vanilla together in a large liquid measuring cup and set aside.

Beat the butter on high in a stand mixer with the paddle attachment until light and creamy, about 2 minutes. Scrape down the sides of the bowl. Continue beating while gradually adding the sugar - it should take a couple of minutes to completely incorporate all the sugar. Continue to beat until very light and fully, about 3-4 minutes more. Scrape down the sides of the bowl. Add the eggs, one at a time, beating well after each addition.

On low speed, add the flour mixture in 3 parts, alternating with the sour cream in 2 parts, beginning and ending with the flour mixture. Scrape the sides of the bowl as you mix. Blend thoroughly.

Scoop the batter into 2 greased and floured 9-inch cake pans. Lightly tap the pans on the counter so that the batter settles evenly.

Bake until a toothpick inserted in the center comes out clean, about 20 to 25 minutes. Cool in the pan on a rack for 5-10 minutes, then place cakes onto the rack to cool completely.

*Substituting frozen strawberries for fresh works just fine.

Source: Modified from FoodNetwork.com Raspberry Cake

Mascarpone Filling

6 - 8 oz. mascarpone cheese
Confectioner's sugar
Vanilla extract
Heavy cream

There's no real science to this filling. Let the mascarpone sit out on the counter for a bit to soften so that it will mix easily. Cream the mascarpone, then add sugar, vanilla, and cream until you reach the taste and consistency you desire.

Cream Cheese Icing

8 oz. cream cheese
1 teaspoon vanilla extract
4 cups sifted confectioner's sugar (approx. 1 pound)
2 Tablespoons milk

In large bowl, cream the cream cheese with an electric mixer. Add vanilla and combine. Gradually add sugar, one cup at a time, beating well on medium speed. Scrape the sides and bottom of the bowl often. When all the sugar has been mixed in, the icing will appear dry. Add milk and beat at medium speed until light and fluffy. Keep bowl covered with a damp cloth until ready to use. For best results, keep icing bowl in refrigerator when not in use. Icing can be stored up to 2 weeks in the refrigerator in an airtight container. Re-whip before using.

Makes 3 cups.

Note: Quantities of confectioner's sugar and/or milk may vary to reach the desired consistency, particularly depending on the weather. Humidity can have a great impact on icing.

Someone's in the Kitchen with Kelly... Bryon Makes Dinner!

aThe husband recently decided that he will take over cooking dinner on Saturdays and wants to use this as an opportunity to experiment and try new recipes. He started out last Saturday with three recipes from Tyler Florence's Real Kitchen cookbook. Pork chops with spiced apples and raisins, roasted carrots with orange brown butter and sage, and corn pudding. All three were big hits with us and are definitely "keepers". I could eat the orange brown butter with sage poured over ice cream!


Thick Pork Chops with Spiced Apples and Raisins

Note: Bryon cut the brine recipe in half, as we were only doing two pork chops, but made the full recipe of spiced apples and raisins. Before we even made it, we suspected that part of the recipe would be good enough to want leftovers. We were right! To prepare four pork chops, double the brine recipe

Pork Chops:
1/2 gallon water
1/2 cup brown sugar
1/2 cup sea salt
1/2 cup frozen apple juice concentrate, thawed
1 1/2 teaspoons whole black peppercorns
1 fresh thyme sprig
2 double-cut bone-in loin pork chops, 1 pound each
Sea salt and freshly ground black pepper
Extra-virgin olive oil

Combine the water, brown sugar, sea salt, apple juice, peppercorns, and thyme in an extra-large plastic bag or container. Give it a stir to dissolve the sugar and salt. Submerge the pork chops in the brine, seal up the bag, and put it in the refrigerator for 2 hours to tenderize the meat. Do not brine any longer than that or the meat will break down too much and get mushy.

Preheat the oven to 350. Remove the pork chops from the brine and pat them dry with paper towels. Sprinkle both sides of the meat with salt and pepper. Put a heavy skillet over medium-high heat. Add a 3-count drizzle of olive oil and get it hot. Lay the pork chops in the pan (if doing 4 chops, put 2 in the skillet at a time) and brown 4 minutes per side. Remove the pork chops to a large baking pan. Put the baking pan in the oven and roast the chips for 30 minutes. The pork is done when the center is still rosy and the internal temperature reaches 140 to 145 when tested with an instant-read thermometer.

Spiced Apples and Raisins:
2 Tablespoons unsalted butter
3 Granny Smith apples, peeled, cored, and sliced in 1/2-inch-thick wedges
Leaves from 2 fresh thyme sprigs
1/4 cup raisins
3/4 cup frozen apple juice concentrate, thawed
3 Tablespoons brown sugar
1/4 teaspoon ground cloves
Pinch of cardamom
Pinch of dry mustard
Sea salt and freshly ground black pepper
Juice of 1/2 lemon

While the chops cook, melt the butter in a clean skillet over medium-low heat. Add the apples and thyme and coat in the butter; cook and stir for 8 minutes to give them some color. Toss in the raisins and add the apple juice, stirring to scrape up the brown bits. Stir in the brown sugar, cinnamon, cloves, cardamom, and dry mustard; season with salt and pepper. Squeeze in the lemon juice to wake up the flavor and simmer for 10 minutes or until the apples break down and soften. Spoon the spiced apples over the pork chops to serve.


Roasted Carrots with Orange Brown Butter and Sage

1 bunch young carrots, with tops
1/4 cup extra-virgin olive oil
Sea salt and freshly ground black pepper
4 Tablespoons (1/2 stick) unsalted butter
1 orange, halved
1 Tablespoon brown sugar
4 sage leaves

Preheat the oven to 350. Cut off all but 1 inch of the carrot tops, leaving a little green. Put the carrots in a large shallow pan, add the oil, and season with salt and pepper. Turn to coat the carrots. Stick them in the oven and bake for 30 minutes, until the carrots are fork-tender.

While the carrots are roasting, melt the butter in a skillet over medium-low heat. Swirl the pan around and cook until the butter begins to become brown and nutty. (Note: Tyler Florence says "crazy nutty".) Squeeze in the juice from the orange halves, add the brown sugar and sage, and continue to cook for 2 minutes or until syrupy.

Remove the carrots from the oven and arrange them on a platter. Drizzle the orange brown butter over the carrots and serve.


Corn Pudding

2 ears fresh corn, in the husk
2 cups milk
1/2 cup heavy cream
2 Tablespoons unsalted butter
3/4 cup yellow cornmeal
3 Tablespoons chopped fresh chives
Sea salt and freshly ground black pepper
3 eggs, separated

Preheat the oven to 350. Put the 2 ears of corn, in their husks, in the oven, directly on the center rack. Roast the corn for 30 minutes, until soft. Cool slightly so you don't burn your hands, then remove the husks. Cut the kernels off the cob with a sharp knife and set the loose corn aside. Leave the oven on.

In a large pot over low heat, combine the milk, cream, and butter. Once the butter has melted, turn up the heat slightly and bring the mixture to just under a boil. Pour in the cornmeal in a slow, steady stream, whisking at the same time. Cook and whisk constantly until the cornmeal is blended in and the mixture is smooth and thick, like a porridge. Take the pot off the stove and fold in the corn, chives, salt, and pepper. Mix in the egg yolks, one at a time, to make it more like a batter. In a separate bowl, beat the egg whites until they hold stiff peaks. Fold the whites into the corn pudding to lighten it. Coat the bottom and sides of an 8x8-inch baking dish with nonstick spray. Spoon the batter into the prepared baking dish and bake for 25 to 30 minutes. When it's done, the corn pudding will look puffed and golden brown, like a souffle.

Source: Adapted from Tyler Florence's Real Kitchen cookbook.

Cuppycakes!


For Week 3 of my Wilton cake decorating class, we were instructed to bring cupcakes that we would decorate to demonstrate the different skills we learned that week, including using icing dots to make faces and fruit, star flowers, swirl flowers, and the Wilton rose. My instructor also gave me a few lessons in making daisies and hibiscus.

The Wilton Rose

For my cupcakes, I used the same cake and icing recipes I prepared for the sunflower cake I made for Week 2 - Yellow cake with butter cream icing. To make the roses and hibiscus flowers, however, the icing must be a stiff consistency, so less liquid should be added.

Hibiscus

Double Roses

Mmmm, cake!


This past month, I took Wilton's Course 1 Cake Decorating class at my local Michael's. For our first week of actual decorating, we were instructed to bring in a shaped cake. I have a really pretty sunflower pan that I bought several years ago at William's Sonoma, so I decided to use that. I was wanting to make a yellow cake with lemon curd filling. A friend provided me with two cake recipes - one she had used and thought was quite good, and a second that she had recently found and was wanting to try. Initially, I used the first recipe she sent. Unfortunately, that cake didn't come out of my pan properly, so I had to bake a second cake. I decided to make lemonade from these lemons, and use this opportunity to make the second cake recipe. While the first recipe was good, the second one was the winner, hands-down! I now have a go-to yellow cake recipe.

Fluffy Yellow Cake

2 1/2 cups cake flour, plus extra for dusting pans
1 1/4 teaspoons baking powder
1/4 teaspoon baking soda
3/4 teaspoon salt
1 3/4 cups sugar, divided
10 Tablespoons (1 1/4 sticks) unsalted butter, melted and cooled slightly
1 cup buttermilk, room temperature
3 Tablespoons vegetable oil
2 teaspoons vanilla extract
6 large egg yolks, room temperature
3 large egg whites, room temperature

Adjust oven rack to middle position and heat to 350. Grease two 9-inch round cake pans (9 inches wide by 2 inches high) and line bottoms with parchment paper. Grease paper rounds, dust pans with flour, and knock out the excess.

Whisk flour, baking powder, baking soda, salt and 1 1/2 cups of the sugar together in a large bowl (1/4 cup sugar will remain).

In a 4-cup liquid measuring cup or a medium bowl, whisk together melted butter, buttermilk, oil, vanilla, and egg yolks.

In clean bowl of a stand mixer fitted with whisk attachment, beat egg whites at medium-high speed until foamy, about 30 seconds. With mixer running, gradually add the remaining 1/4 cup sugar. Continue to beat until stiff peaks form, 30 to 60 seconds (whites should hold peak, but mixtures should appear moist). Transfer to another bowl and set aside.

Add flour mixture to now-empty mixing bowl fitted with whisk attachment. With mixer running at low speed, gradually pour in butter mixture and mix until almost incorporated (a few streaks of dry flour will remain), about 15 seconds. Stop mixer and scrape whisk and sides of bowl. Return mixer to medium-low speed and beat until smooth and fully incorporated, 10 to 15 seconds.

Using rubber spatula, stir 1/3 of the egg whites into the batter to lighten, then add remaining whites and gently fold into batter until no white streaks remain.

Divide batter evenly between the prepared cake pans. Lightly tap pans against the counter 2 to 3 times to dislodge any large air bubbles.

Bake until cake layers begin to pull away from sides of pans and toothpick inserted into center comes out clean, 20 to 25 minutes. (Note: since I was using a single, larger pan, my baking time was obviously longer.) Cool cakes in pans on wire rack for 10 minutes. Loosen cakes from sides of pans with small knife, then invert onto greased wire rack and peel off parchment. Turn cakes over and cool completely on rack, about 1 1/2 hours.

Source: Adapted from the February 2008 issue of Cook's Illustrated

Lemon Curd

3 lemons
1 1/2 cups sugar
1/4 pound unsalted butter, room temperature
4 extra-large eggs
1/2 cup lemon juice (3 to 4 lemons)
1/8 teaspoon kosher salt

Using microplane or carrot peeler, remove the zest of 3 lemons, being careful to avoid the white pith. Put the zest in a food processor fitted with the steel blade. Add the sugar and pulse until the zest is very finely minced into the sugar.

Cream the butter and beat in the sugar and lemon mixture. Add the eggs, one at a time, and then add the lemon juice and salt. Mix until combined.

Pour the mixture into a 2-quart saucepan and cook over low heat until thickened (about 10 minutes), stirring constantly. The lemon curd will thicken at about 170 degrees, or just below a simmer. Remove from the heat and cool or refrigerate.

Source: Adapted from The Barefoot Contessa Cookbook

Buttercream Icing (Medium Consistency)

1 cup butter
1 teaspoon vanilla extract
4 cups sifted confectioner's sugar (approx. 1 lb.)
2 Tablespoons milk

In large bowl, cream butter with electric mixer. Add vanilla. Gradually add sugar, one cup at a time, beating well on medium speed. Scrape sides and bottom of bowl often. When all the sugar has been mixed in, the icing will appear dry. Add milk and beat at medium speed until light and fluffy. Keep bowl covered with a damp cloth until ready to use. For best results, keep icing bowl in refrigerator when not in use. This icing can be stored 2 weeks if refrigerated in an airtight container. Just re-whip before using.

Makes 3 cups.

For thinner (spreading consistency) icing, add up to 2 Tablespoons light corn syrup, water, or milk until desired consistency is reached.

To assemble, I split the cake into two layers. I piped a thick "dam" of icing along the edge of the bottom layer, spooned the lemon curd inside, then placed the top layer.


From there, it was just a matter of decorating with a star tip (Wilton #21).


Wednesday, April 16, 2008

I Got Your Kolache!

I've loved kolaches for about as long as I can remember, so when Erica mentioned that she grew up eating homemade kolaches and had a recipe she could share with me, I was sold!

I've always loved cream cheese kolaches myself, but requests were made for some fruit fillings as well. In the end we had plain cream cheese, apricot, and cherry kolaches, as well as cream-cheese-apricot and cream-cheese-cherry.

You'll have to excuse the time-stamp on the photos. We were at my parents' lake house and I hadn't brought my camera with me that weekend, so I had to borrow my niece's camera.


Authentic Czech Kolaches

Dough:
1 cup milk
1 packet yeast
3 Tablespoons sugar
1 teaspoon salt
1 egg, beaten
1/4 cup shortening
3 - 3 1/2 cups flour


Warm the milk and pour into a bowl. Dissolve yeast, sugar, and salt in the milk. Add the beaten egg and shortening, mixing well. Add flour. The dough is ready when it "chases the spoon around the bowl" - usually 3 - 3 1/2 cups of flour.

Cover the dough in the bowl and let it rise in a warm place until it has doubled in size, about 2-4 hours.

Melt a stick of butter. Grease the tops of two cookie sheets and preheat the oven to 350. After the dough has risen, punch it down in the bowl. Lightly flour a work surface. Portion out dough into roughly tablespoon-sized portions. Roll the pieces of dough in your palm to form balls. Evenly space dough balls on cookie sheets and brush with melted butter. Allow them to proof for an additional 20-40 minutes.

Press an indentation in the center of each ball and fill with a heaping teaspoon of filling. Allow kolaches to set for 10 minutes more before baking.


Sprinkle with posypka (recipe below). Bake for 15-20 minutes. Kolaches should be a light gold brown in color when done.


Yield: Approximately 24 kolaches.

Cream Cheese Filling:
16 ounces cream cheese, softened
2 egg yolks
1/2 cup sugar
1 teaspoon vanilla


Beat ingredients together in medium sized bowl until incorporated.


Posypka:
1/2 cup butter
1 cup sugar
1/2 cup flour


Combine all ingredients in a bowl until mixture resembles coarse crumbs.


Source: Adapted from Grandma Kaspar and Texas Monthly, courtesy of Erica

A Bowl Full of Chickpea Goodness

So it's been another long absence - this whole moving thing really eats up your time! But now that we're settled in San Antonio, it's time for some long-overdue updates. First up - hummus!

I LOVE me some hummus! This was my first attempt at actually making it, but it couldn't be easier!


Garlic Hummus

2 15.5 oz cans chickpeas (garbanzo beans)
5 cloves garlic
1 teaspoon salt
Juice of 2 lemons
1/3 cup Tahini (sesame paste)
1 Tablespoon olive oil, plus additional

Drain and rinse the beans (you can reserves some of the liquid to be used in place of the olive oil). Place everything but the olive oil in the food processor and process until smooth. Stream in the olive oil (you may need a bit more than 1 Tablespoon; alternately, you can use some of the reserved liquid from the chickpeas to reach the desired consistency).

I like to serve it drizzled with additional olive oil and sprinkled with sea salt or kosher salt. Enjoy with pita, carrot sticks, or whatever your heart desires!

Yield: Approximately 2 cups

Source: Adapted from The Eat Clean Cookbook, via Foodie Bride

Sunday, January 27, 2008

Just in time for Mardi Gras - King Cake!

My dear husband grew up in Slidell, Louisiana, so the question is not whether or not we will have king cake at this time of year. It's more a question of how many, what kind, and where we will get them from. Thanks to my lovely friend Erica, I was armed and ready to ask Bryon what he thought about the idea of trying our own hands at making king cake. His replied very enthusiastically, deciding to take matters into his own hands and tackling the recipe himself.

We made two king cakes (Note: The recipe says you should have enough dough to make three. If Bryon had rolled the dough out thinner, I think we could have gotten three out of it). We did one with a cream cheese filling, which we kept for ourselves - YUMMY! The second one was a regular cinnamon-sugar king cake, which Bryon took to his mom's house. It was met with overwhelming approval, especially by his brother Chris. From what I hear, Chris thinks it may be one of the best things we've ever made.


Louisiana King Cake

Parker House Roll Dough*:

6-6 1/2 cups all purpose flour, divided
1/2 cup sugar
2 teaspoons salt
2 packages yeast
1 stick unsalted butter, melted
1 egg
2 cups hot water (110-120 degrees F)

In a large bowl, combine melted butter, 2 1/4 cups flour, sugar, salt, and yeast. With mixer at low speed, gradually pour the hot water into the dry ingredients. Add egg and beat well. Gradually add the remaining flour until thickened.

Turn out onto a floured surface and knead the dough until most of the flour is gone. Put doough in oiled bown, turning to coat on all side. Cover and allow dough to rise until doubled in size. Punch down and knead again, about 5 more minutes.

Divide dough into 3 portions (to make 3 medium cakes). Roll dough on floured surface. Spread with melted butter.

For a traditional cinnamon-sugar cake: Sprinkle cinnamon-sugar mixture (we used a combination of white and light brown sugars) over the buttered dough.

For a cream cheese cake: Soften 8 ounces of cream cheese and beat until spreadable, sweeting with powdered sugar if desired. Sprinkle surface of dough with powdered sugar and spread with the softened cream cheese.

To assemble: Starting at one edge, roll the dough in jelly-roll fashion. Twist the roll, then place on a greased cookie sheet, forming it into a ring.

Bake at 350 degrees F until lightly bowned. A plastic baby can be inserted into the cake after cooling if desired.

To ice: Combine powdered sugar, milk, and vanilla extract until desired flavor and consistency are reached. Divide into small bowls to color yellow, green, and purple. Drizzle over cooled cake, and sprinkle with decorating sugar or turbinado sugar to decorate.

*Roll dough can also be used to make dinner rolls or cinnamon rolls.

For cinnamon rolls: Prepare according to directions for cinnamon-sugar king cake and roll dough in jelly-roll fashion. Instead of twisting, slice into rolls. Place in greased pan. Allow to rise, then bake as directed above. Icing is the same as for the King Cake.

For Parker House Rolls: After the first rising, punch doguh down and need for an additional 5 minutes. Form rolls, rolling in melted butter to coat the top. Place on greased pan, about 1/2-1 inch apart. Allow to rise again before baking. Bake at 350 degrees F until lightly browned.

Source: Adapted from Mom Trivette's recipe, courtesy of Erica.

Grandmommy's Rolls

Having shared the beautiful results of Elizabeth's grandmother's secret, sacred roll recipe on here, I decided it was time to give my grandmommy's roll recipe the respect it deserves.


Mother's Rolls*

Combine:

2 cups lukewarm milk
1/4 cup shortening (Mother - I use 1/3 cup)
1/4 cup sugar
1 teaspoon salt

Sprinkle or crumble 2 packages or cakes of yeast into the mixture (Mother - I dissolve the yeast in 1/4 cup warm water)

Stir until dissolved. Add 5-6 cups sifted flour, mixing thoroughly to make a soft dough.

Turn out onto lightly floured board and knead until smooth and elastic. Place dough in greased bowl, brush with melted shortening, cover and let rise in a warm place until doubled in bulk (about 2 hours). Do not punch down. Turn out onto lightly floured board and shape as desired. Cover and let rise until doubled in bulk*. Bake in a hot oven (425 degrees F) for 15-20 minutes, depending on size. Makes approximately 3 dozen rolls.

*"Mother" is what my mom called my grandmommy, thus these are known as "Mother's Rolls." Her recipe notes are in italics.

*I usually brush the rolls with melted shortening before putting them in the oven, just to ensure that they brown nicely. I also usually cover them with foil during the first 10-15 minutes of baking.

And we're back... Strawberry Cupcakes in Two Varieties!

Despite the lenghty sojourn from blogging, this superhero has still been cooking - and taking some pictures - but not doing much writing about it. A slight fever and a screaming headache is keeping me from getting anything else done that I should be doing this afternoon, though, so blog updating it is!

I made these back in early October when I was on a bit of a cupcake streak. I made one batch of the cupcakes, and made half a batch of the two different icings below for variety. I never could decide which one I thought was the better combination. My opinion varied from day to day, or between afternoon and evening. Try them both ways and feel free to offer your opinion!


Strawberry Cupcakes*

3 cups cake flour
2 teaspoons baking powder
1/2 teaspoon baking soda
1/2 teaspoon kosher salt
1 1/4 cups sour cream
1/2 cup fresh** strawberries, pureed
1 small package strawberry Jello
1 tablespoon pure vanilla extract
1 cup (2 sticks) unsalted butter, room temperature, cut into small pieces
2 cups sugar
5 large eggs, room temperature

Preheat oven to 350 degrees F.

Sift flour, baking powder, soda, and salt into a medium bowl. Whisk to combine evenly. Stir the sour cream, strawberries, jello, and vanilla together in a large liquid measuring cup and set aside.

Beat the butter on high in a stand mixer with the paddle attachment until light and creamy, about 2 minutes. Scrape down the sides of the bowl. Continue beating while gradually adding the sugar - it should take a couple of minutes to completely incorporate all the sugar. Continue to beat until very light and fully, about 3-4 minutes more. Scrape down the sides of the bowl. Add the eggs, one at a time, beating well after each addition.

On low speed, add the flour mixture in 3 parts, alternating with the sour cream in 2 parts, beginning and ending with the flour mixture. Scrape the sides of the bowl as you mix. Blend thoroughly.

Scoop the batter into prepared muffin tins (either lined with cupcake papers or greased and floured). Lightly tap the pans on the counter so that the batter settles evenly.

Bake until a toothpick inserted in the center comes out clean, about 18-22 minutes. Cool in the pan on a rack for 5-10 minutes, then place cupcakes onto the rack to cool completely.

Yield: 36 cupcakes (if I'm remembering correctly)

*Can be prepared as 2 9-inch round cakes. If doing so, cool in pan on a rack for 20 minutes before turning cakes out onto the rack to finish cooling.

**Substituting frozen strawberries for fresh works just fine.

Source: Modified from FoodNetwork.com Raspberry Cake

Cream Cheese Icing

2 (8 ounce) packages cream cheese, softened
1/2 up unsalted butter, softened
2 cups sifted powdered sugar
1 teaspoon vanilla extract

In a medium bowl, cream together the cream cheese and butter until creamy. Mix in the vanilla, then gradually beat in the powdered sugar. Store any leftover frosting in the refrigerator after using.


Romanov Icing

2 sticks unsalted butter, softened
6 cups powdered sugar
3 teaspoons vanilla extrat
4 teaspoons Grand Marnier*
2 pinches orange zest
2 dashes cinnamon (you want to be able to taste the slightest hint of cinnamon in the icing)

Mix butter and powdered sugar on low speed until just combined. Add vanilla extract, Grand Marnier, orange zest, and cinnamon. Beat on high until frosting is at the desired consistency. Taste and adjust the vanilla/Grand Marnier if necessary (I added a little extra of both), but be careful not to overdo!

*Substituting Triple Sec works just fine.

Source: Adapted from Foodie Bride